Although bathrooms are typically small spaces, when renovating them the costs can quickly mount up. With waterproofing, tiling and fixtures and fittings to consider, there are a lot of parts to think about in fixing up this room – but it doesn’t have to cost a fortune if you work smartly and strategically.
Taking stock of the basic ‘bones’ of the bathroom can help you minimise costs when you start refreshing the space, if it reveals that design elements can be reworked within the existing layout of the room.
It’s important to have a practical mindset when you’re working on a bathroom space, because functionality is crucial. Foregoing practicality for luxury will negate any value that the element of luxury may introduce.
Begin by looking at the room’s amenities. Are there items that need to be included that are currently missing? Is there wasted space that could be better utilised?
Assess the condition of the existing elements of the bathroom to determine how far it will need to be stripped back. What is the condition of any substrate? What are the walls and ceiling constructed of? Are the windows functional, or do they need to be reworked too?
Ensuring that any renovation is completed on a sound foundation is essential to the ultimate success of the project. There are no shortcuts to success in this area, but if you’re willing to put in the hard work and planning, the rewards can be handsome.
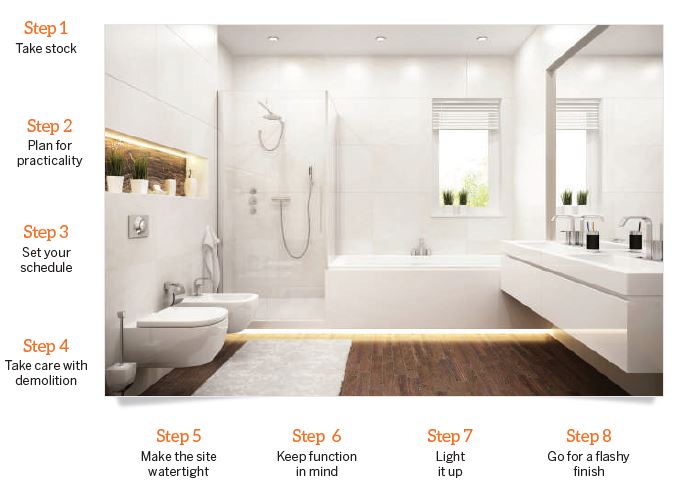
STEP ONE: TAKE STOCK
The all-important first step is to come up with a vision of what you want the renovated bathroom to look like. Then you can plan out your renovation carefully so you know what you need.
“Start with a list of what does not work in the current bathroom space – in terms of natural light, storage, bath, shower size, mirror placement. This will give you a reference list to make sure these issues are addressed in your plan,” Powell says.
“Ensure there is sufficient storage, as well as enough space to open cupboard doors and drawers. Have a dedicated place to hang towels.”
TOP TIP
“Nailing the practical aspects of the plan without concern for the aesthetic will ensure that nothing is missed and will free you from the constraints of trying to address two concerns at the same time,” Powell advises.
STEP TWO: PLAN FOR PRACTICALITY
“When renovating in a small space, such as a bathroom, getting the layout right is essential, and spending extra time on this stage will save you enormous headaches in the long run,” Powell says.
“Plot out the room on graph paper to the smallest measure possible so that you can really understand the space you are working with. Add in each element in its desired position and realistically assess if there is still sufficient space to comfortably move around within the room.”
 Practicality is the focus and luxury comes later, Powell says, as first and foremost the bathroom should be functional!
TOP TIP
“Measure twice! Expensive mistakes can be easily avoided by being doubly sure that you are planning with accurate information,” Powell says. It may take a little more time out of your schedule, but being exact is crucial.
STEP THREE: SET YOUR SCHEDULE
“Creating a fully planned schedule of works prior to commencement of the job is absolutely critical to the success of any renovation. Your schedule allows you to anticipate problems and address them before they are a reality,” Powell says.
“A schedule ensures that all parties are ready to complete works, and downtime is minimised, reducing the overall cost of the project. Planning and allowing for contingencies ensures you are able to overcome any issues as they arise, with minimal impact on time and budgets.”
This is especially important when doing more major works like tiling the floor.
TOP TIP
“The secret to success in creating a schedule is constant monitoring, good clear communication and staying a step ahead of the process, which enables anticipation of potential problems before they occur,” Powell says.
STEP FOUR: TAKE CARE WITH DEMOLITION
While regarded by many as the ‘fun’ part of any project, the demolition phase can go off track very quickly, in the absence of careful planning and management.
“Minimising the collateral damage during demolition reduces overall costs, and thought should also be given to disposal of fixtures that are surplus to the needs of the reno,” Powell says.
“Windows, baths and vanities are all desirable items for renovators, who often upcycle by resurfacing and reuse them in future renovations. So consider trying to sell surplus fixtures and fittings to a local demolition company or through an online marketplace.”
TOP TIP
“You can offer surplus items for free through organisations such as Freecycle. You’ll find others who have a use for them, and this is more cost-effective as well as better for the environment than sending them to a landfill,” Powell says.
STEP FIVE: MAKE THE SITE WATERTIGHT
“It goes without saying that the waterproofing of any wet area in the home is absolutely critical. A poor waterproofing job can cost you thousands – even tens of thousands – of dollars down the road when it fails to prevent water damage to your property,” Powell says.
“Waterproofing is a labour-intensive process that requires a properly trained worker with specific, high-quality equipment. Application by a certified waterproofer will avoid any problems and mistakes that can be incredibly detrimental to your building and extremely costly to fix.”
A simple way to help waterproof your bathroom is to use materials specifically made for wet environments, such as when you’re painting the walls.
 TOP TIP
“There may be many aspects of a renovation that you can DIY, but waterproofing is one job that you should not attempt to cut costs on and should leave to the professionals to complete,” Powell recommends.
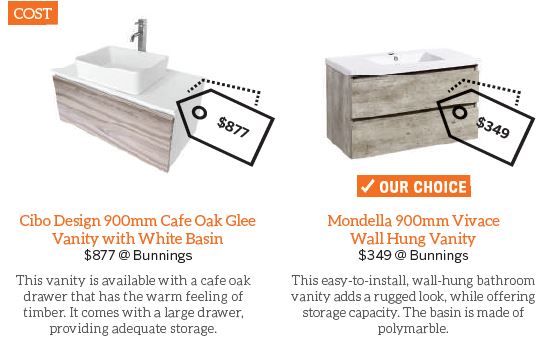
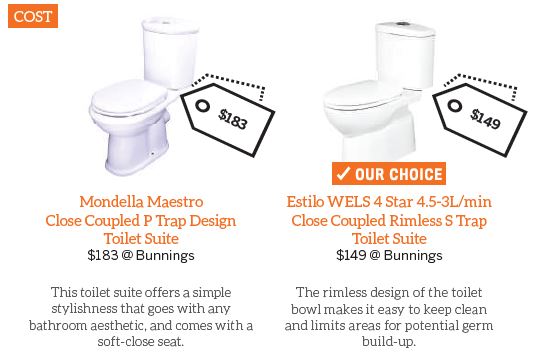
STEP SIX: KEEP FUNCTION IN MIND
As you finish up with the foundations and begin thinking about the more specific aspects of the renovation, it can be tempting to consider aesthetics over usability. However, you need to continue to keep functionality in mind.
This means you should allot some of your budget to quality bathroom fittings, such as toilets and shower areas. If you’re leasing your property out, you want a bathroom that caters to the target demographic and is easy to maintain.
Simplicity is of the essence – you want a potential tenant to be able to easily imagine themselves in the space.
TOP TIP
Give careful attention to bathroom fixtures like tapware. Chrome is the best option if you want something that won’t tarnish or corrode over time, and it goes perfectly with most bathroom designs.
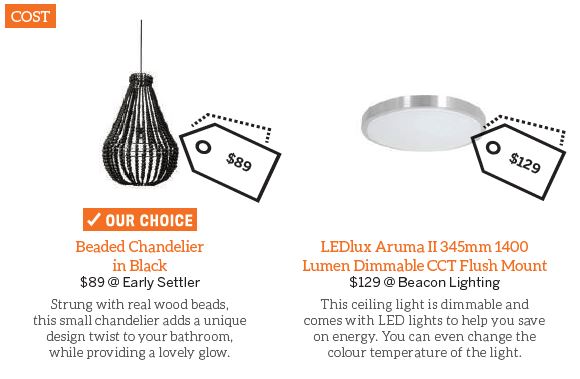
STEP SEVEN: LIGHT IT UP
The right lighting can contribute COST greatly to the atmosphere you create for your bathroom. You want warmth, but you also need to be able to see yourself properly in the mirror.
Make sure to install a good-quality ceiling light – frosted lights are great as they don’t cast shadows. To light up the vanity, you can go for wall sconces for dramatic effect. For versatility, choose lighting with dimmers so you can adjust the glow according to your mood.
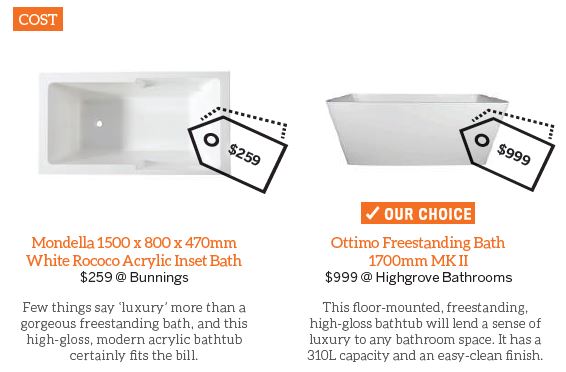
For a touch of luxury, you can even opt for a chandelier if you’ve got the space for it!
TOP TIP
As much as possible, you want to maximise natural light, so you need a number of windows – or even a skylight – to bring in more sun. To protect your (or your tenants’) privacy, install blinds.
STEP EIGHT: GO FOR A FLASHY FINISH
“Maximise the value of your bathroom COST by creating a space that serves as a sanctuary for the homeowner, a place where they can look forward to spending time and unwinding at the end of the day,” Powell says.
“The introduction of a few luxuries in this area will go a very long way and can enhance the space greatly from both an aesthetic and practicality standpoint. Planning the inclusion of luxury items early on in the process will ensure that everything fits within your budget and works can be accommodated as efficiently and cost-effectively as possible in your work schedule.”
TOP TIP
“Don’t overdo it – keep to scale. Your space will lose its impact if there are too many competing elements, or if the selected features do not work in the room,” Powell says.
CASE STUDY
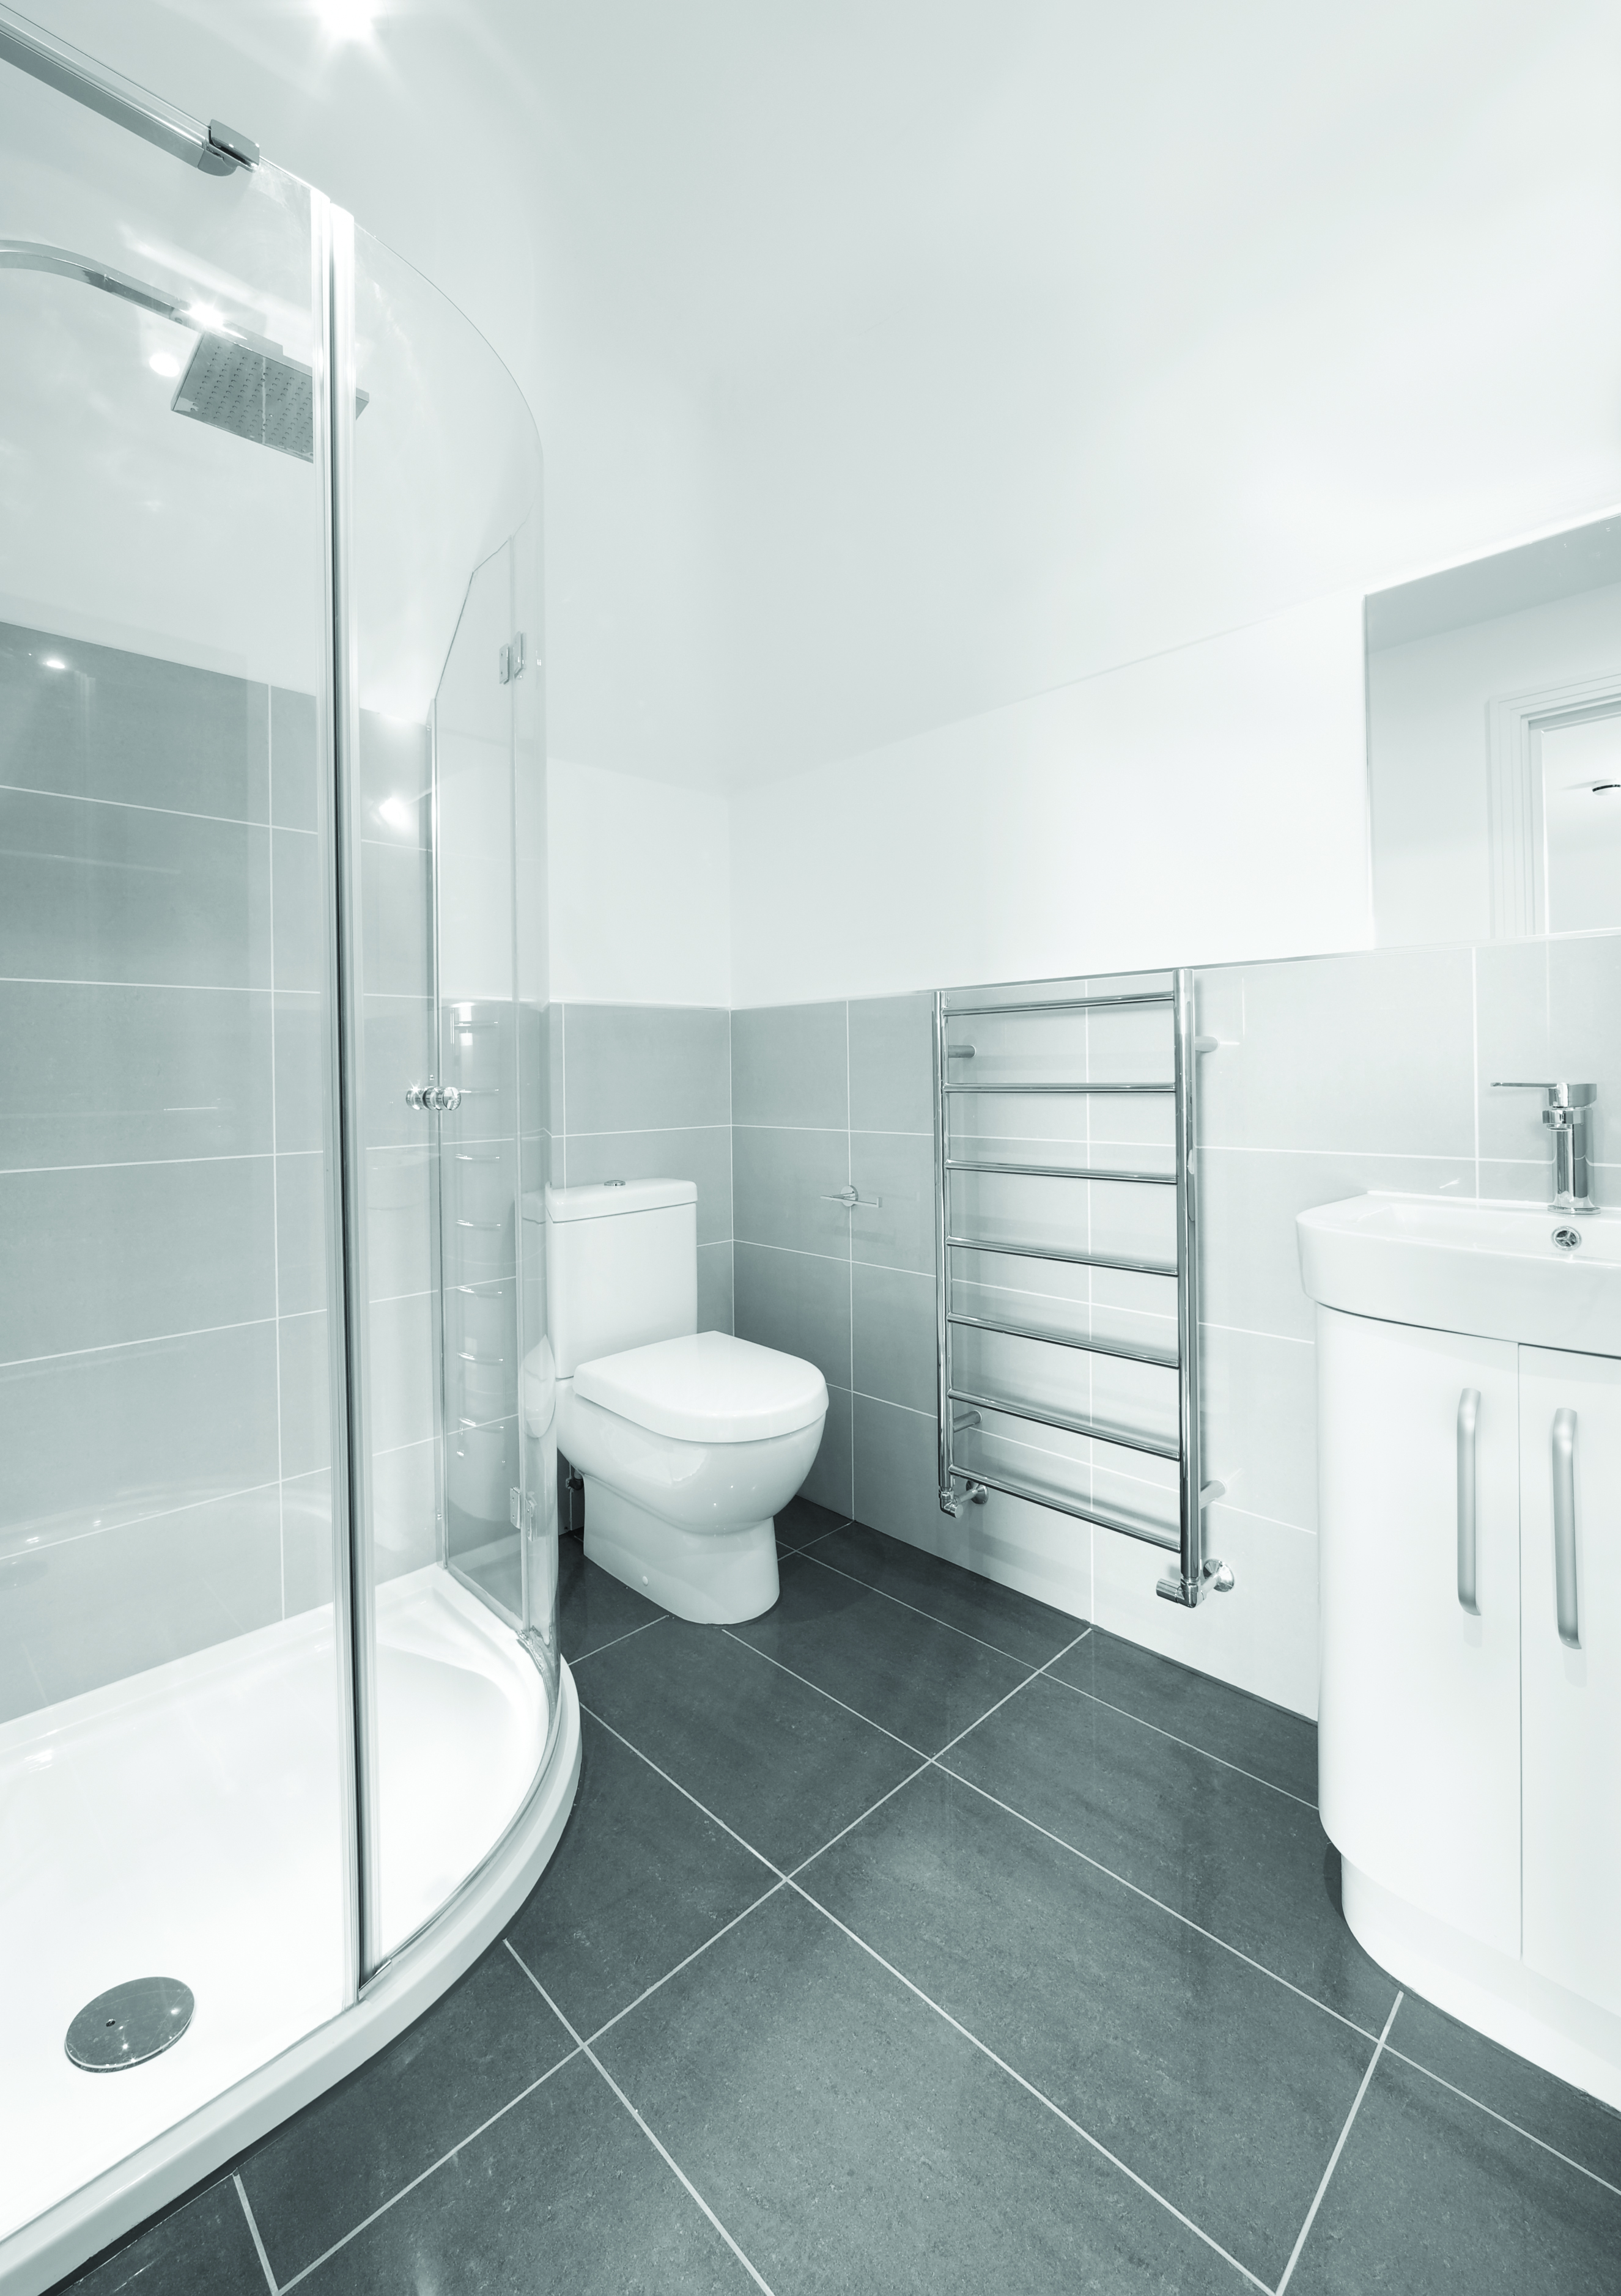
Tasked with refreshing a property in AFTER Central Ballarat to increase its value in terms of liveability and capital gains, Powell found herself faced with a bathroom that needed a lot of work.
The objective of the renovation of this bathroom was to ensure that the value of the space was maximised in terms of liveability of the home and increased property value.
“The original bathroom was extremely dated and in very poor condition,” Powell explains.
Considering the existing state of the room, she chose to approach the renovation with a focus on practicality and creating a list of what the bathroom needed.
“I started with a wish list of items that I wanted to see included based on a practical use of the space as well as achieving a luxurious, sanctuary feel,” she says.
“I knew that this was a significant touchpoint for prospective purchasers as the overall property is quite small, so both the kitchen and bathroom needed to have a big impact.”
However, differing opinions did make it difficult for Powell to execute her vision.

Before
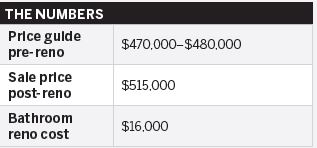
It took time for her to convince her building team of the ideas she had in mind, and with a budget of only $16,000, Powell also had to allocate expenses wisely, especially given the limited room.
"Taking stock of the basic ‘bones’ of the bathroom can help minimise costs if it means that design elements can be reworked within the existing layout"
“The challenges I faced included getting the building team on board with my ideas. I also had to juggle competing priorities in terms of space and incorporating as many of my ideas as possible within the allocated budget,” she says.
Nonetheless, Powell was able to find areas where she could save on costs to manage the available finance, and remained within budget.
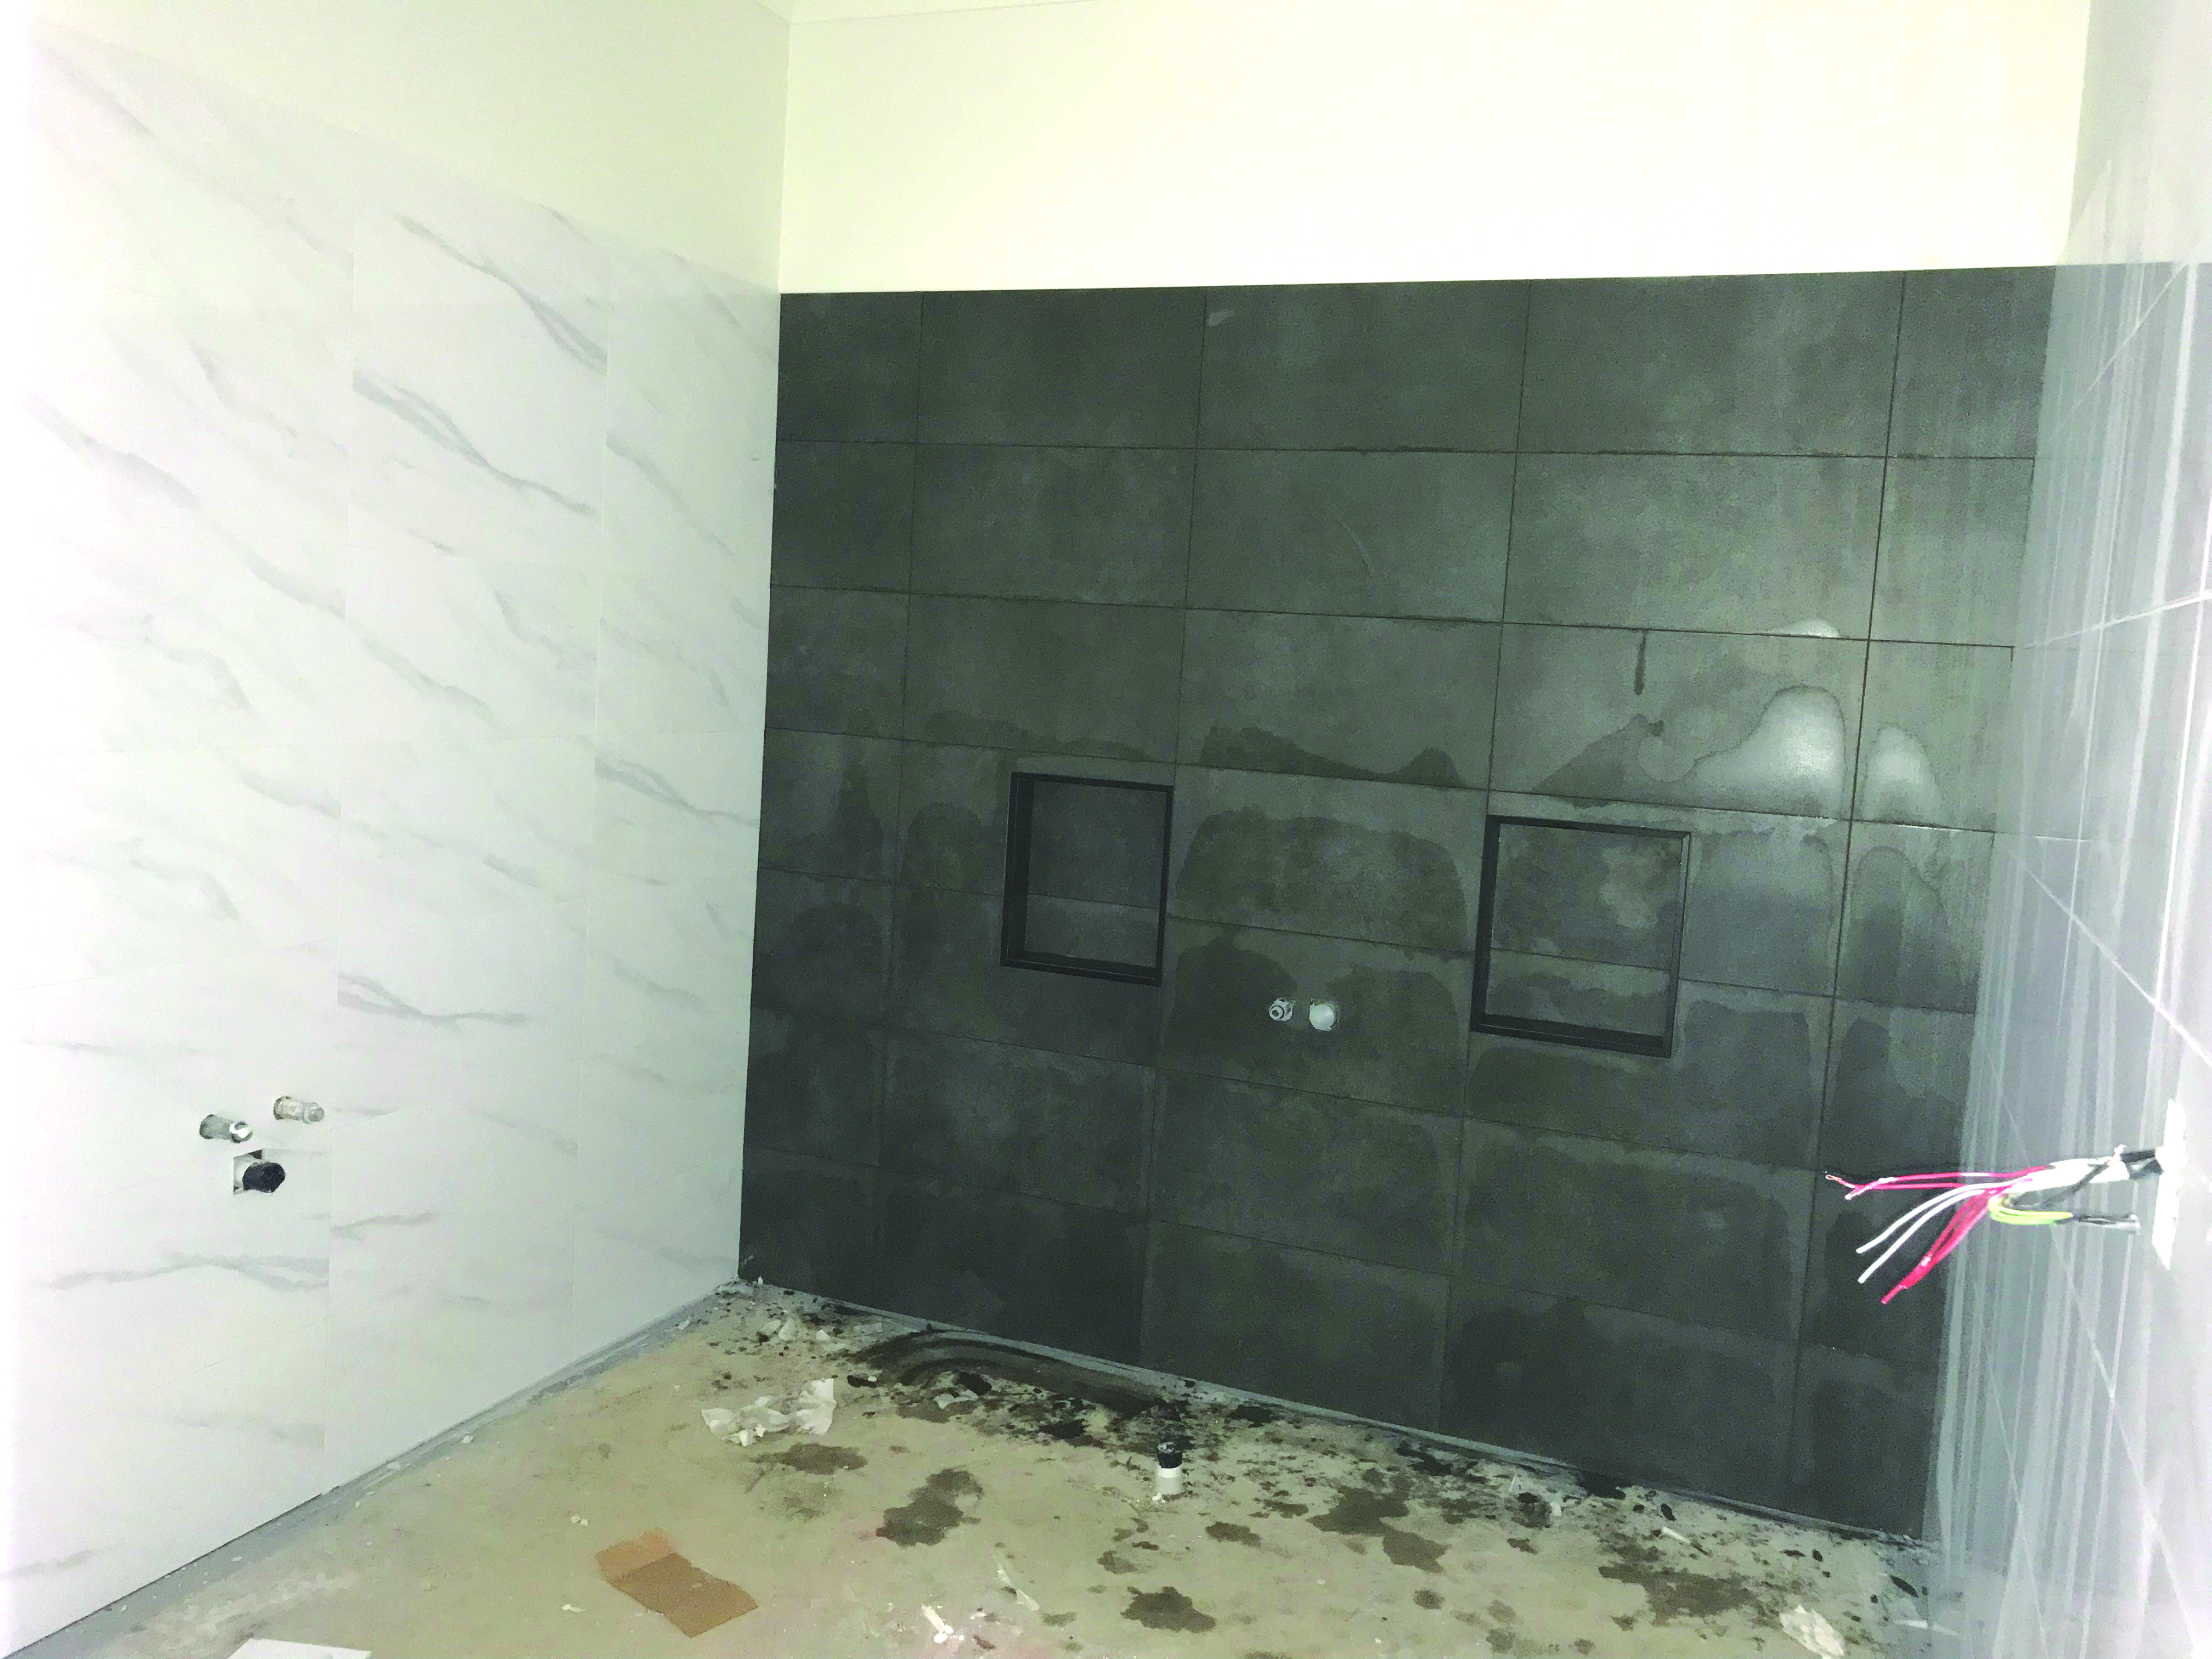
During
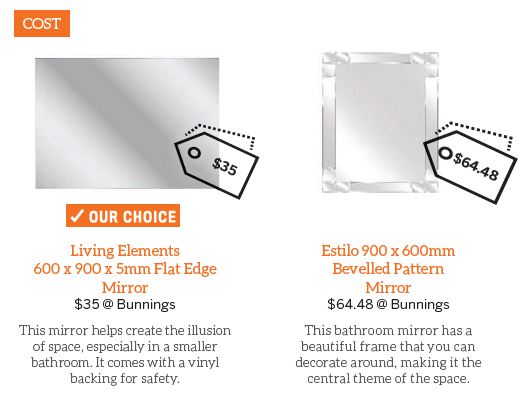
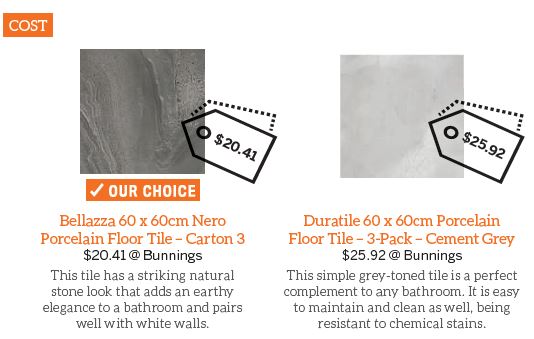
“I was able to minimise cost with a careful selection of tiles and by purchasing off-the-shelf cabinetry,” she explains.
The renovation was a massive success as the fi nished product was snapped up for $35,000 more than the property’s initial value – something Powell credits to how much buyers loved the changes.
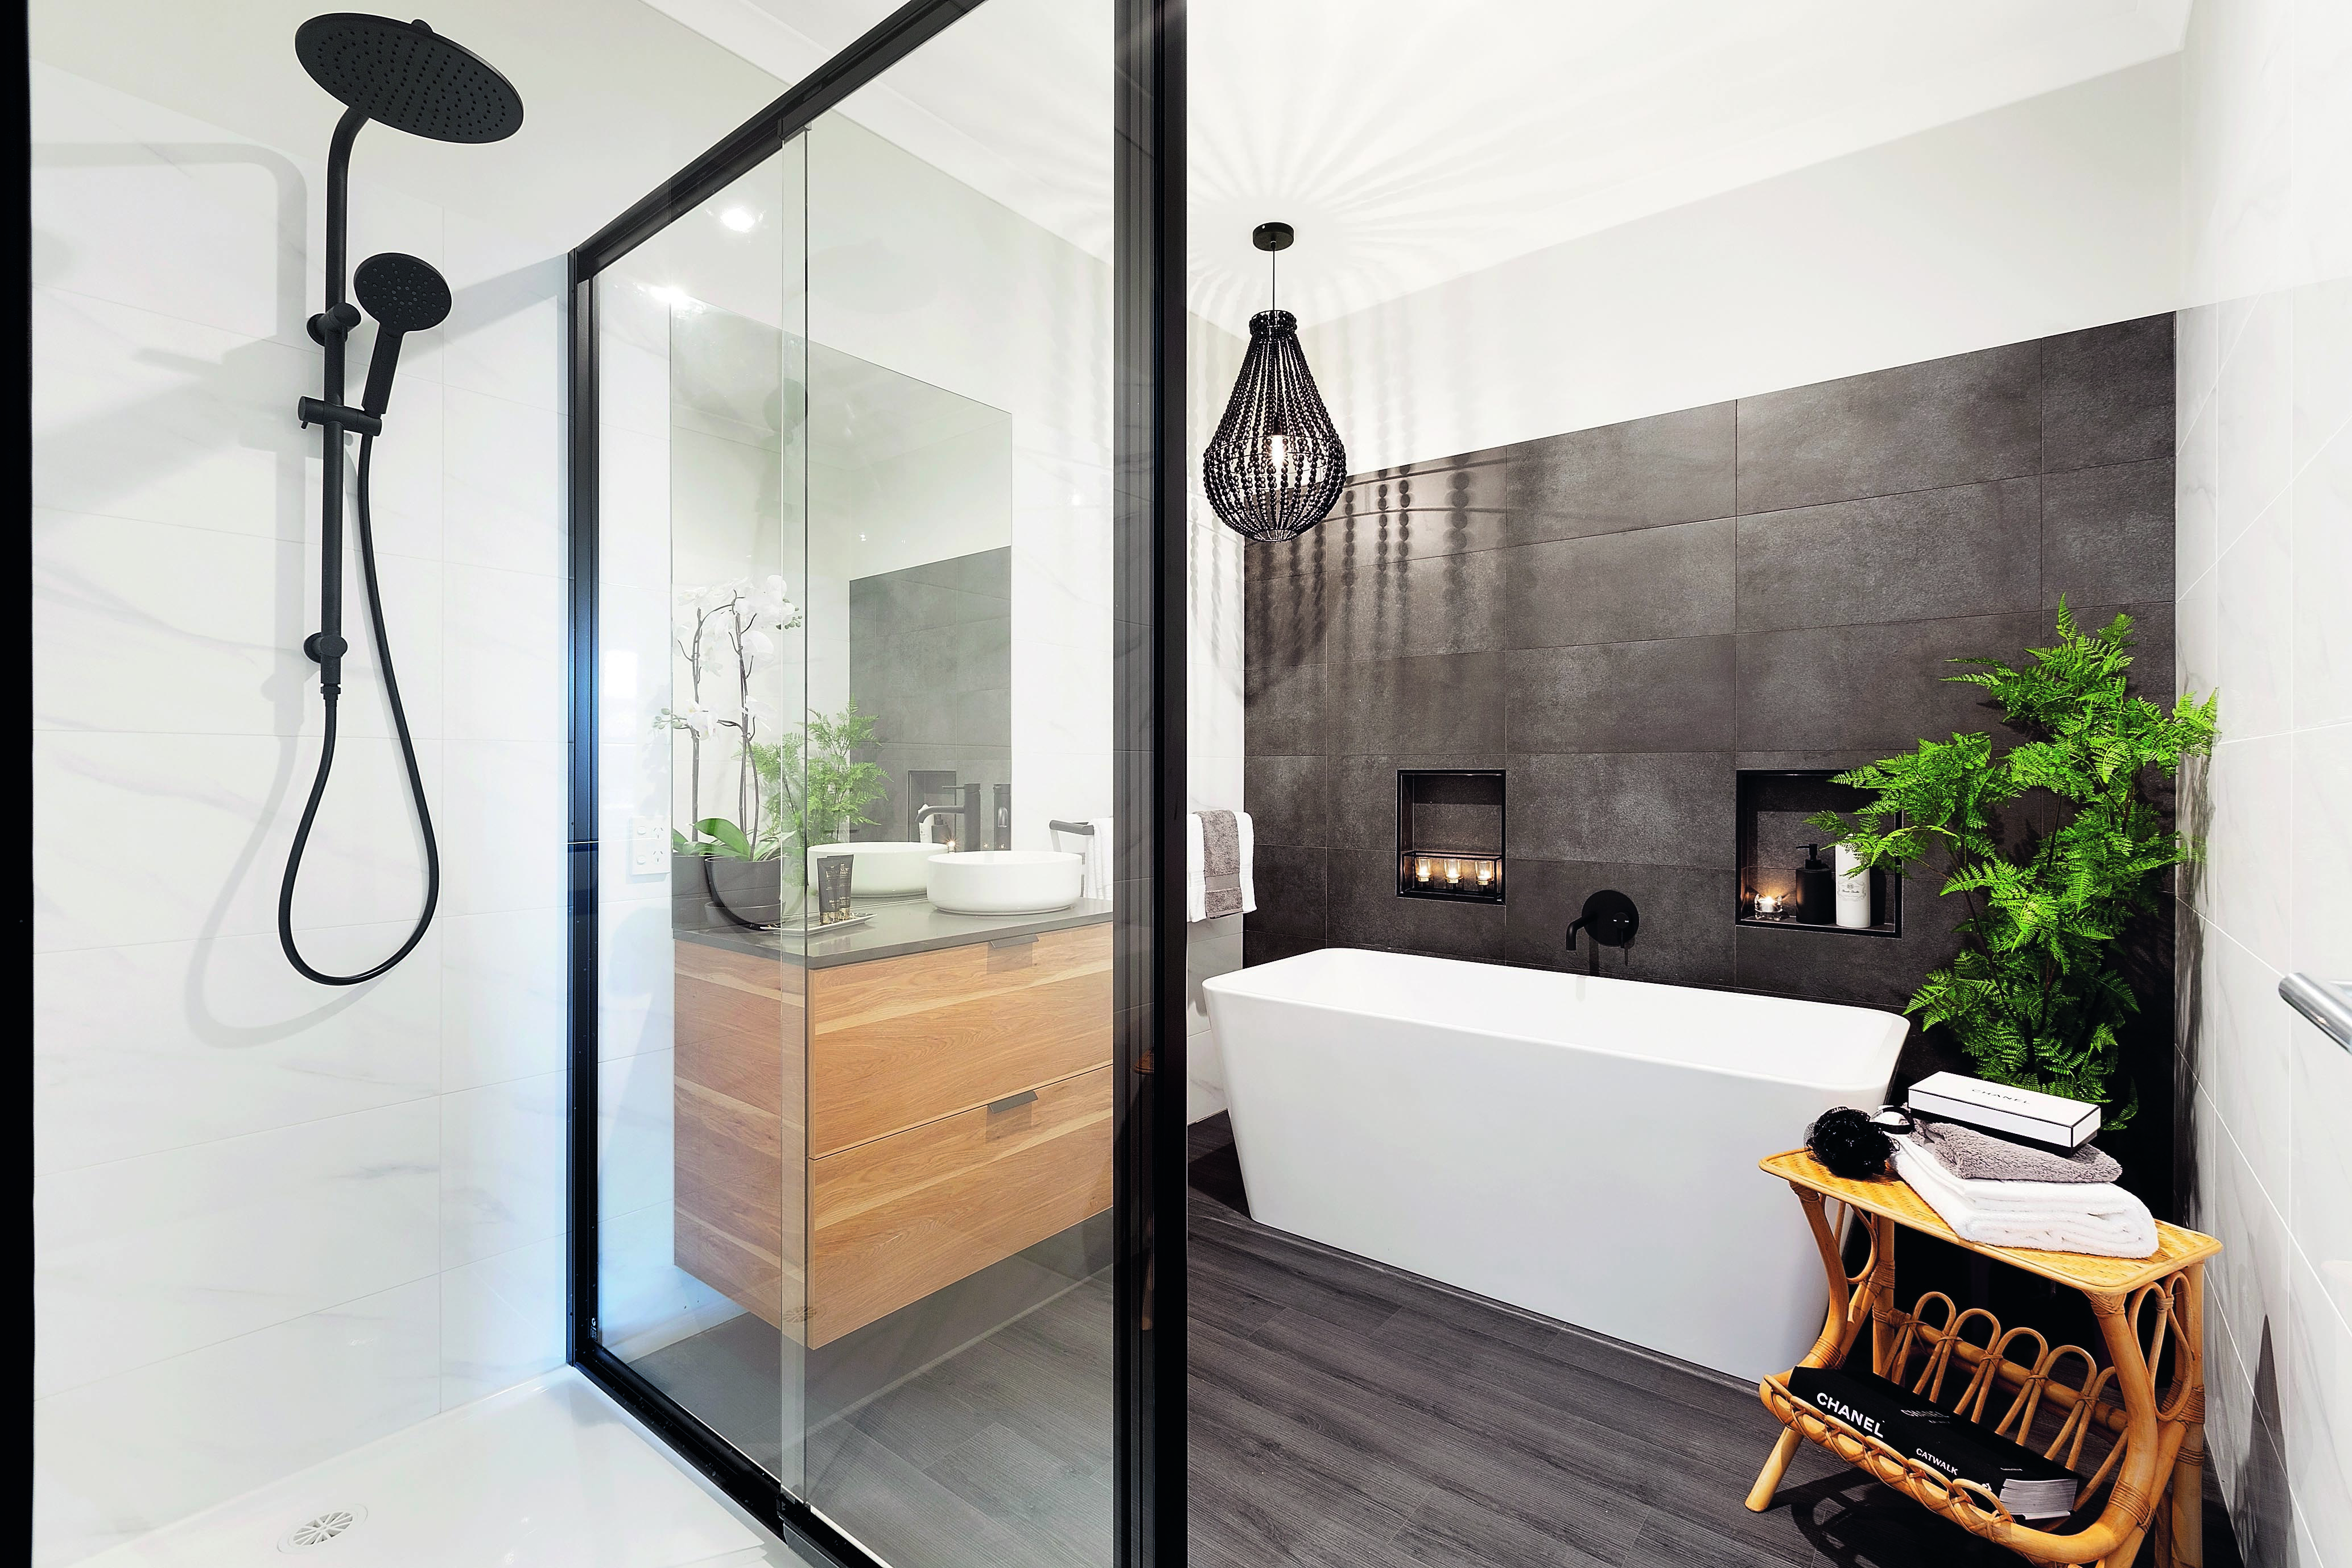
After
“I always enjoy watching renovation projects come together and witnessing ideas that were once just in my head come to life,” she says. “But the response that it has received from everyone who has seen it has been amazing!”

Jo Powell
is the director and lead Property’s stylist at 3 Pea’s Property Styling,
which was recognised as Australia’s Best Property Stylist 2019 in
Your Investment Property Property Investor Awards
Disclaimer: All products and prices listed are correct at the time of printing. The advice contained in this article is for general information only and should not be taken as financial advice. Please make sure to speak to a qualified professional person before making any investment decision.