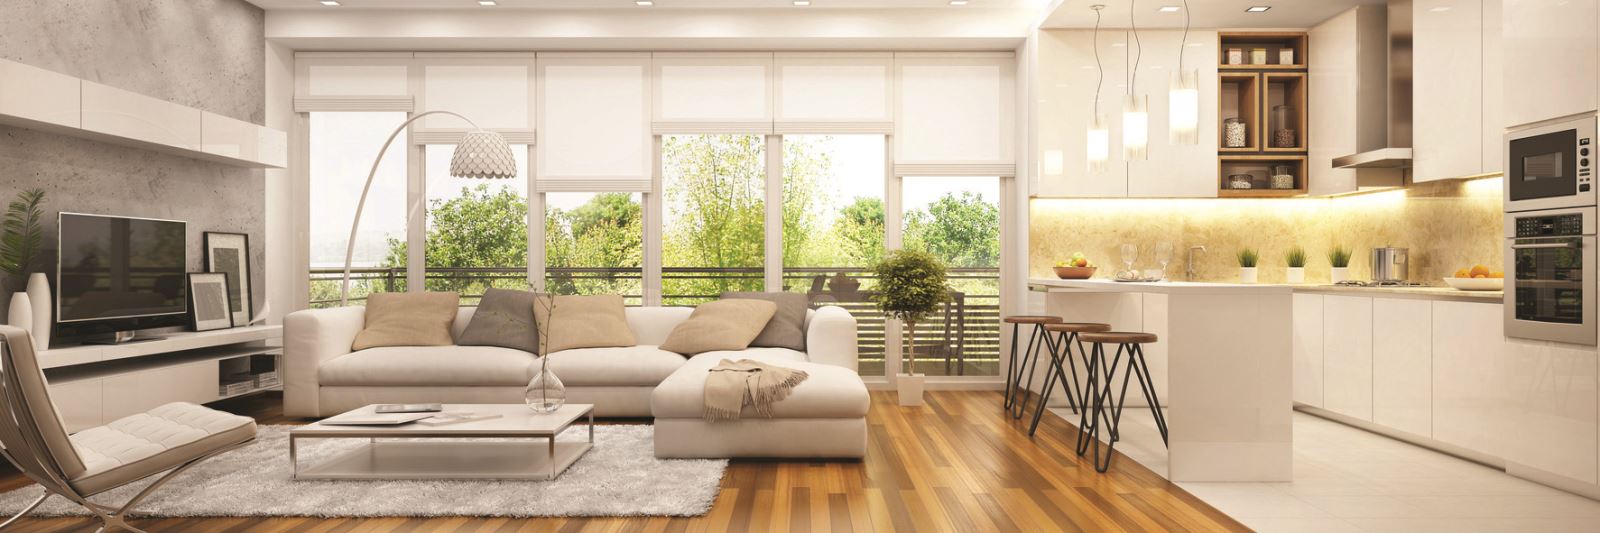
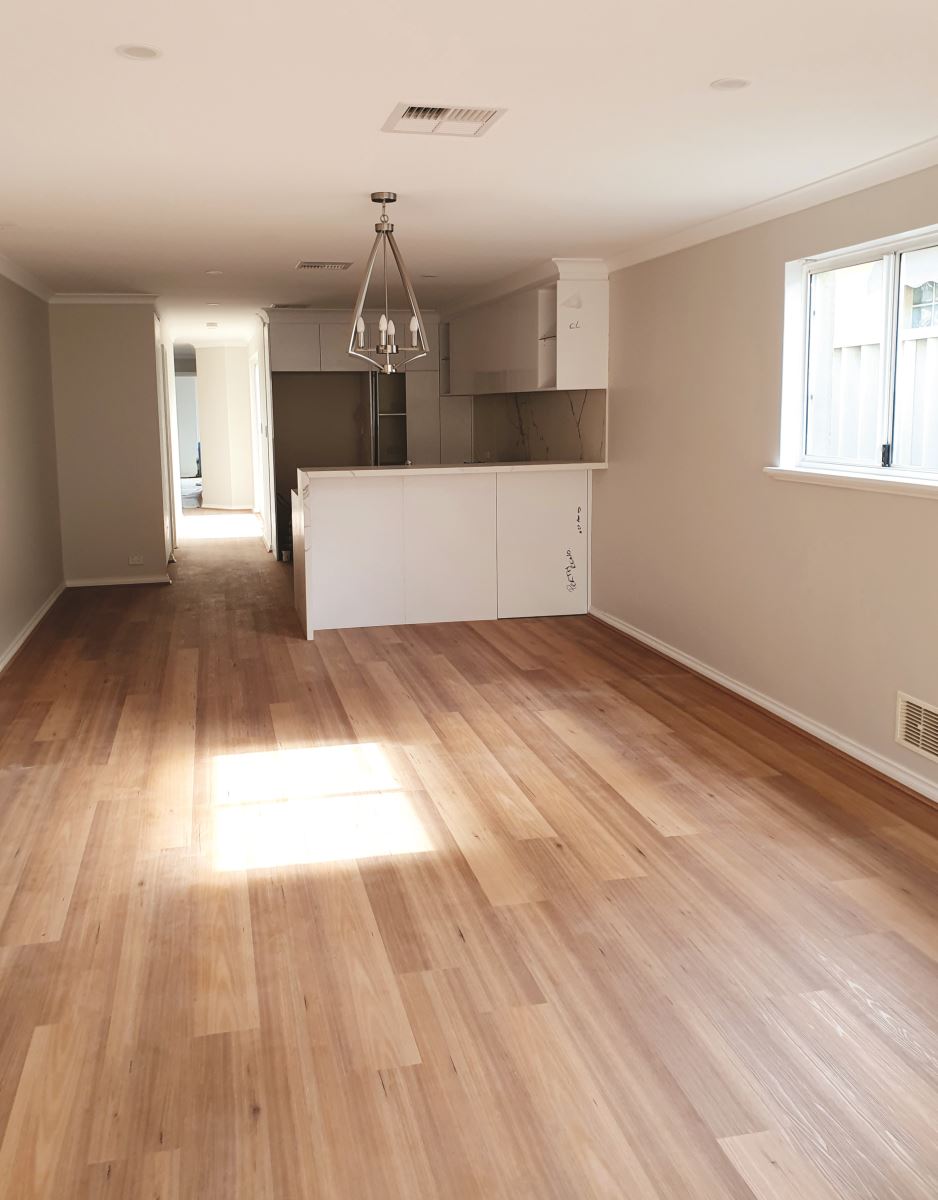
For many years the trend has been to adopt an ‘open-plan’ layout for the main social area of a home.
In an open-plan lounge, the barriers that divide rooms such as walls and doors have been knocked down, which usually results in the space becoming connected to the kitchen and dining areas. That said, not all homes lend themselves to this fashionable trend.
You need to ‘listen to’ or ‘feel’ the house to see what will suit it, rather than force it to be what it’s not. Some of the biggest mistakes made in renovations are the result of a bad choice of floor plan – this occurs mainly when people don’t understand the space requirements for open planning, or how to design the space for the way it will be used.
If you feel that the right choice for you and your property is to open up the living area, it is vital that you understand the correct process for doing this and the flow-on effect it will have on other rooms in the house, such as the kitchen and dining room. The last thing you need is to end up removing a structural wall incorrectly, or working without council permission, which won’t just blow your budget and cause safety issues but could bite you in the butt on resale too! Here’s how to do it right.
THE PROJECT: LIVING ROOM
.JPG)
STEP ONE: FOCUS ON FUNCTION
.JPG)
Having an open-plan living area creates more space, which could be very useful if your property is on the cramped side.
“Smaller homes generally only have the one lounge room, meaning that the decision needs to be made based on the kitchen space, layout and use of the home. In these situations, the more general the renovation in relation to intended purpose the better,” says Shannon Burke, founder of Perth Renovation Projex.
“Quite often, such rooms are used for movie-watching as well as socialising or entertaining, so the aim of the game is to create a space that can convert as the occupants require.”
TOP TIP
Lighting is a major consideration when it comes to creating the mood you want for a room. Downlights evoke warmth and cosiness and are perfect for a space that’s designed for entertainment and relaxation!
STEP TWO: THINK CONVENIENCE
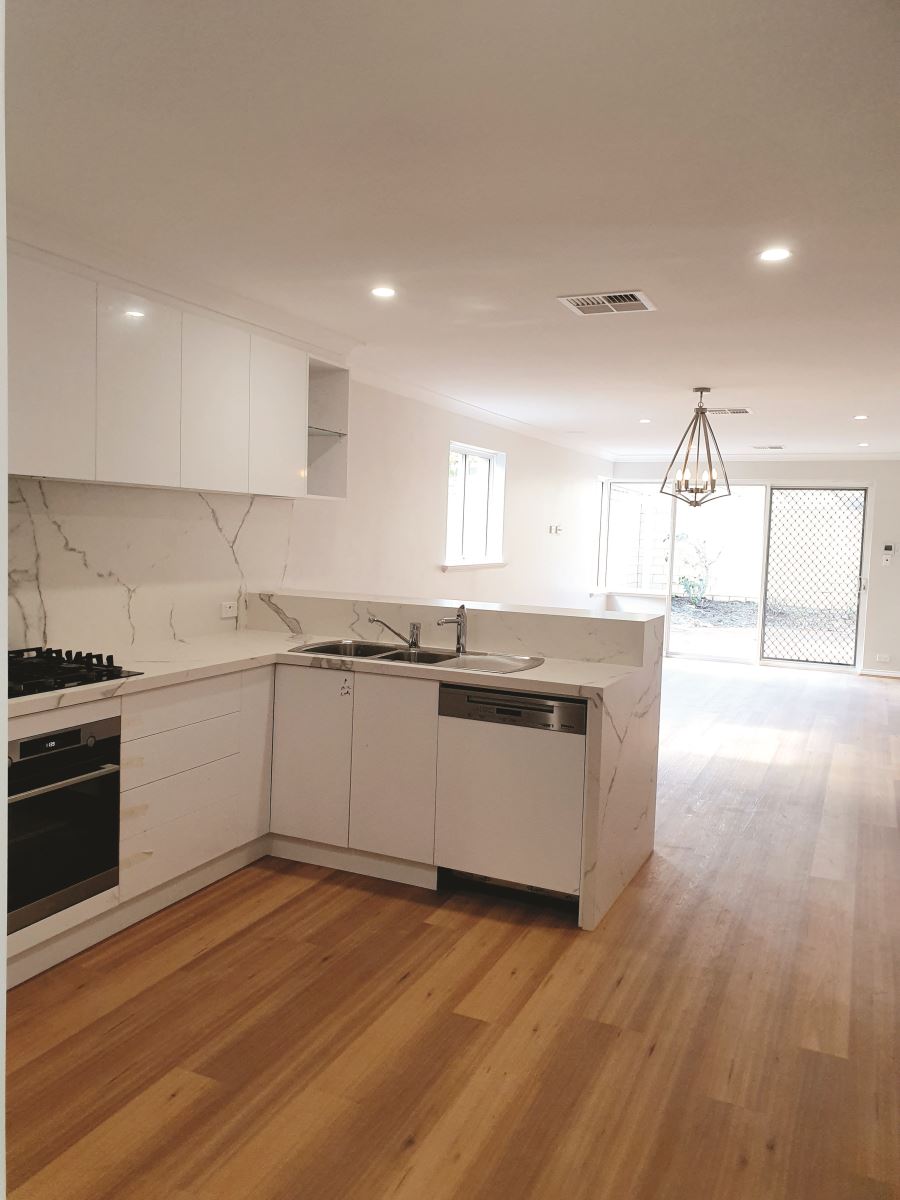
In opening up a living room, a popular trend is to connect it to the kitchen and dining areas, which makes entertaining guests a lot easier.
 “You can remain connected whilst you prepare the food, and you don’t feel isolated when doing the dishes,” Burke explains.
“You can remain connected whilst you prepare the food, and you don’t feel isolated when doing the dishes,” Burke explainsOn a typical day, this means you can watch your favourite cooking show while you prep for a meal. And if you have kids at home, an open-plan living area helps you keep your eye on the little ones without having to sacrifice time in the kitchen.
TOP TIP
Flow is crucial in an open-plan layout, as you want it to feel like one natural connected space rather than a number of different areas with no walls. Consistent fl ooring is an easy way to link rooms.
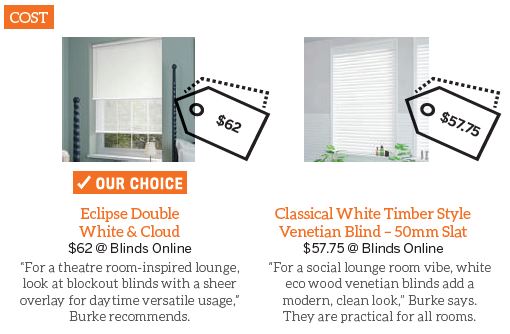
STEP THREE: BRIGHTEN THINGS UP
Lighting doesn’t just come from bulbs but from Mother Nature as well. Having nice, big windows will brighten up the room and add to the illusion of space throughout your interconnected open-plan area.
However, you may still want the option of being able to adjust the lighting during the day without giving up the natural glow of the sun. This is where a good set of blinds comes in.
“There are so many different types of blinds available, and depending on if you are covering windows or doors, this may shape your decision,” says Burke.
TOP TIP
Veri Shades are a combination of blinds and fabric curtains – you can pull the fabric across like a curtain or adjust the opaqueness with a wand. They are perfect for sliding doors.
STEP FOUR: GO FOR NEUTRAL TONES

The colour of the walls goes a long way towards setting the tone of the living room, so Burke recommends using light shades, especially if you’re not yet certain about the function of the space.
“Unless you know that your living room or lounge will only be used as a theatre room, keep the ceilings white. Using deep tones can create a feeling of warmth and comfort, but can also make a large space feel small,” she explains.
Greys are great for a classy feel that goes with most aesthetics, while whites bring more warmth.
TOP TIP
Feature walls can be an excellent design feature that distinguishes the lounge area from the other spaces without the need for a wall. Burke suggests painting the feature wall just a shade darker, or choosing a deep colour.
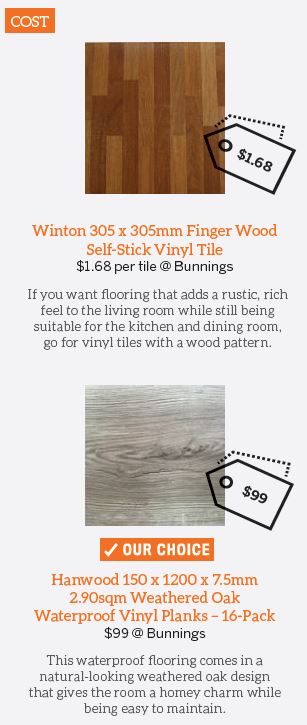
STEP FIVE: CONSIDER THE FLOORING
A good carpet or a nice rug can make a big difference in an open-plan living room, especially if you want to create a different atmosphere while maintaining consistent flooring across the connected spaces.
.JPG) “I believe in the three-floor rule – only three different types of fl ooring per house. Essentially, if you have tiles in the bathroom and carpet in the bedrooms, then there can only be one more type of flooring running through the main living areas of the house,” Burke says.
“I believe in the three-floor rule – only three different types of fl ooring per house. Essentially, if you have tiles in the bathroom and carpet in the bedrooms, then there can only be one more type of flooring running through the main living areas of the house,” Burke says.
“If you are going for a warm, theatretype or formal lounge, you can play with carpet as an option.”
TOP TIP
In lieu of carpeting, Burke says “keeping original boards or what is running through the main part of the house and using a rug is always a cheaper and versatile option”.
STEP SIX: PLAY UP THE AESTHETICS
In an open-plan layout, as the living room is linked to other areas of the house it’s important to give each space its own identity. If you’re working with an old house, you may have a fireplace that could be the ideal base for adding decorative elements as a design feature for the room.
“In older homes, you may have an existing fireplace to navigate in your design. You can highlight it either with tiles or feature colours,” Burke says.
Fireplace tiles can be purchased in various unique designs, any of which could form the central decorative element of the lounge room.
TOP TIP
Fireplace tiles don’t just have to be for a fireplace – they can be used to decorate a bare wall as well. Get creative and use decorative tiles to jazz up a plain background.
.JPG)
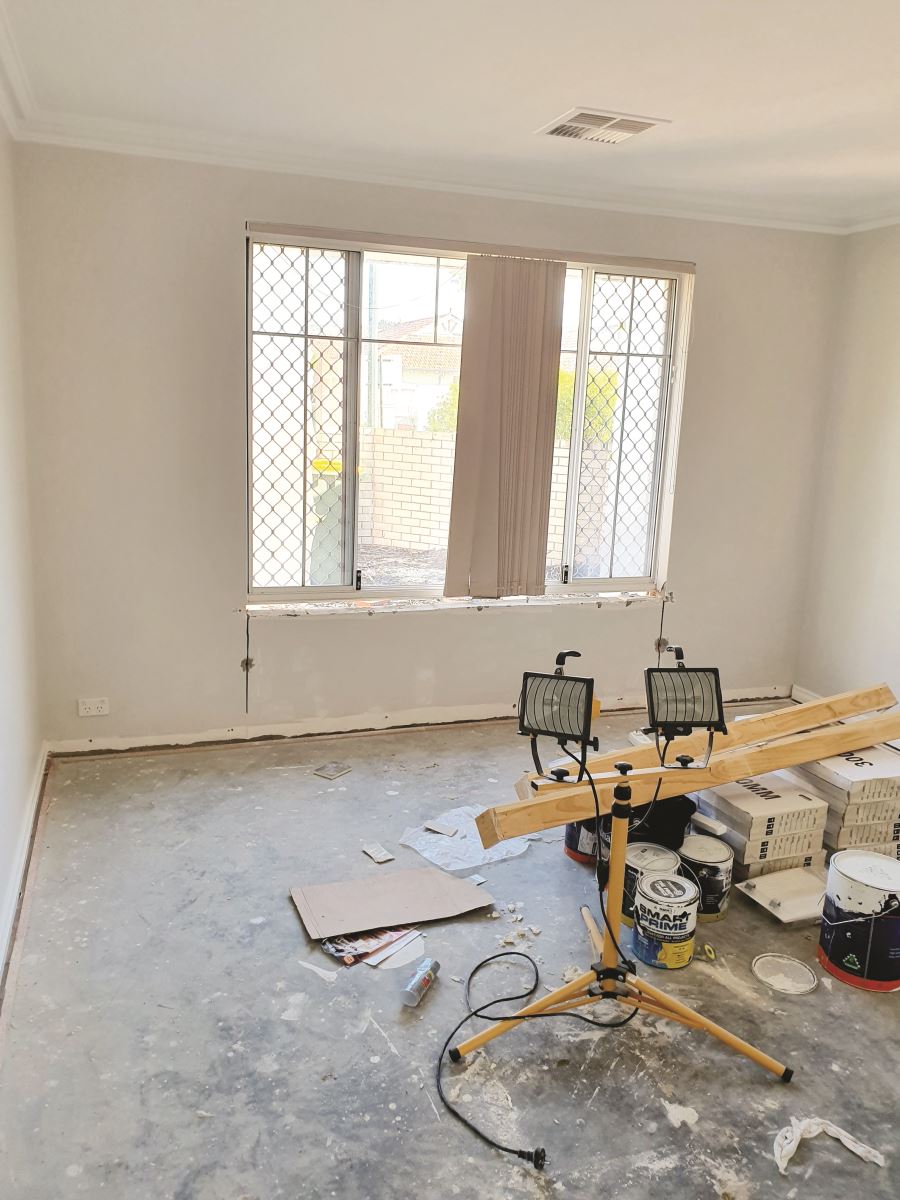
STEP SEVEN: DON’T FORGET THE CEILING
Removing a wall goes well beyond COST knocking it down – there are many other factors you need to think about.
“These include potential damage to the current flooring; epic dust; a wet cut in the house to cut the wall, render and white-set it once the wall is removed to blend the cut. Let’s not forget new gyprock for the ceiling to match the rooms,” Burke says.
“The ceiling joists can bow over time, often due to being too green when installed. This means that when you join the ceilings, you may end up with different heights.”
.JPG)
TOP TIP
“A standard cornice is great if you’re opening up the room; otherwise, try a decorative moulding cornice to define the room!” Burke says. “This choice will depend on how ‘busy’ your design is.”
STEP EIGHT: GET COUNCIL APPROVAL
With such a major renovation on your COST hands, you have to ensure that you get the approval of the local council. The application requirements that you need to prepare are details of your proposed changes, including the updated layout and floor plans. It is also advised that you get a Certificate of Design Compliance from a building surveyor.
One of the reasons wall removal is such a significant renovation is that it can involve electrical works.
“Thinking about electrical points is important before you begin, as some of your electrics may require wall chasing,” Burke says.
.JPG)
TOP TIP
Powerboards with long extension cords give you adequate access to electricity even if you have limited electrical points in the room. Powerboards with surge protection are ideal for preventing damage.
CASE STUDY
Shannon Burke’s latest project gave her the “perfect candidate” for a full renovation.
“The property was neat, tidy and in original condition at 20 years old. The idea was to take an understated and basic property and rebuild it to executive standards with lock-up-and-leave potential,”
Burke made changes like adding fullheight tiling, stone tops and built-in wardrobes, but for her the “real magic” to the renovation lay in the modified living room floor plan.
“The house had a very large living space relative to its actual size – almost the first half of the property was all one very large, semi-open living room. Yet three metres away was the dining room, kitchen and yet another living room.”
Before
After
To maximise this massive space, Burke turned part of the front living area into a formal sitting room.
“The vibe and intention of the front lounge was as an adults’ retreat room; a place for entertaining or simply watching the rugby with a few cold ones,” she explains.
“I decided to take the current window and make it into French doors. This linked the private courtyard right outside to the indoor space. I always advise connecting indoor and outdoor spaces in living rooms where possible to increase the space and create flow.”
This change became a problem, however, as a delayed order mucked up Burke’s schedule.
The French doors ended up being five weeks from order, meaning that I couldn’t get the carpet to the formal lounge done as I wanted to. It also meant the painters couldn’t finish due to the plaster not being completed. Not ideal at all!” she says.
Before
.jpg)
After
In the rear lounge, Burke did away with the awkward original floor plan and connected this area to a formal dining space. The structural change did mean that she had to redo the ceiling as well to maintain the support, but her efforts have paid off.
“With more modern homes reflecting open living and more versatile spaces, this house had the room to accommodate a more modern design. I would say the money spent on this renovation would equal the increase in value!”
Disclaimer: All products and prices listed are correct at the time of printing. The advice contained in this article is for general information only and should not be taken as financial advice. Please make sure to speak to a qualified professional person before making any investment decision.